


Connecting PPR pipe tees to pumps is a crucial step in various plumbing and fluid - handling systems. As a PPR Pipe Tee supplier, I have witnessed firsthand the importance of proper installation to ensure the efficiency and longevity of the entire setup. In this blog, I will guide you through the process of connecting PPR pipe tees to pumps, covering everything from understanding the components to the actual installation steps.

Understanding the Components
Before we start the connection process, it's essential to have a good understanding of the components involved. PPR (Polypropylene Random Copolymer) pipe tees are fittings that allow the flow of fluid to be split into two directions or combined from two directions into one. They come in different sizes and configurations to meet various application requirements.
Pumps, on the other hand, are devices used to move fluids by mechanical action. They can be centrifugal pumps, positive displacement pumps, or other types depending on the specific needs of the system. The type of pump and the PPR pipe tee you choose will depend on factors such as the flow rate, pressure requirements, and the nature of the fluid being transported.
Selecting the Right PPR Pipe Tee
When connecting PPR pipe tees to pumps, selecting the right tee is of utmost importance. Consider the following factors:
- Size: The size of the PPR pipe tee should match the size of the pipes and the pump inlet and outlet. A mismatch in size can lead to reduced flow rates and increased pressure losses.
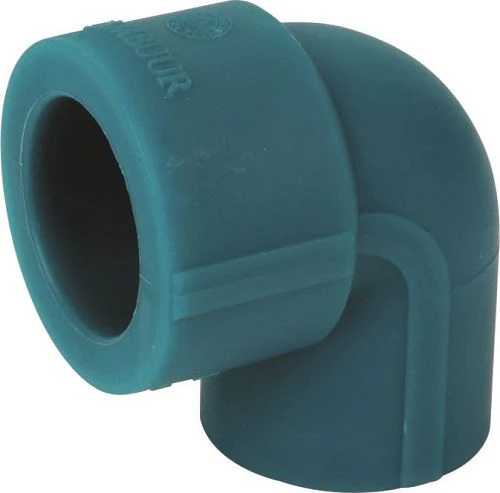
- Material Quality: Ensure that the PPR pipe tee is made of high - quality materials. High - quality PPR tees are more resistant to corrosion, chemicals, and temperature changes, which is crucial for the long - term performance of the system. For example, you can check out our High Quality Blue PPR 90 Degree Reducing Elbow for high - grade PPR fittings.
- Configuration: Depending on the layout of your system, you may need different types of PPR pipe tees, such as equal tees or reducing tees. Equal tees have the same diameter for all three ports, while reducing tees have different diameters for the branches.
Preparing for the Connection
Once you have selected the appropriate PPR pipe tee and pump, it's time to prepare for the connection. Here are the steps:
- Gather Tools: You will need tools such as a pipe cutter, a soldering iron or a PPR pipe welding machine, a measuring tape, and a deburring tool. Make sure all tools are in good working condition.
- Measure and Cut Pipes: Use a measuring tape to determine the correct length of the PPR pipes needed for the connection. Then, use a pipe cutter to cut the pipes to the appropriate length. After cutting, use a deburring tool to remove any rough edges from the cut ends of the pipes.
- Clean the Components: Clean the ends of the PPR pipes, the PPR pipe tee, and the pump inlet and outlet using a clean cloth. Remove any dirt, grease, or debris that could affect the quality of the connection.
Connecting the PPR Pipe Tee to the Pump
The actual connection process involves the following steps:
- Apply Welding Agent (if required): Some PPR pipe connections require the use of a welding agent. Follow the manufacturer's instructions to apply the welding agent evenly on the outside of the pipe end and the inside of the fitting socket.
- Insert the Pipe into the Tee: Carefully insert the cut end of the PPR pipe into the socket of the PPR pipe tee. Make sure the pipe is inserted all the way to the bottom of the socket. Hold the pipe and the tee in position for a few seconds to allow the welding agent to set.
- Connect the Tee to the Pump: Once the pipe is securely connected to the tee, connect the tee to the pump inlet or outlet. If the pump has threaded connections, use appropriate thread sealant to ensure a leak - free connection. If it's a socket - based connection, follow the same welding or joining process as for the pipe - tee connection.
- Check for Alignment: Ensure that all components are properly aligned. Misalignment can cause stress on the pipes and fittings, leading to leaks or premature failure.
Additional Considerations
- Expansion and Contraction: PPR pipes expand and contract with temperature changes. Leave some room for expansion and contraction by installing expansion joints or flexible connectors where necessary.
- Supporting the Pipes: Properly support the PPR pipes and the pump to prevent excessive stress on the connections. Use pipe brackets or hangers at regular intervals to support the pipes.
- Testing the System: After connecting the PPR pipe tee to the pump, test the system for leaks. Slowly fill the system with fluid and check all connections for any signs of leakage. If a leak is detected, immediately shut off the fluid supply and repair the connection.
Other Useful PPR Fittings
In addition to PPR pipe tees, there are other PPR fittings that can be useful in your plumbing system. For example, PPR S - Bend can be used to change the direction of the pipe in a smooth curve, which is useful in situations where space is limited. PPR 90° Equal Elbow is another common fitting that can be used to change the direction of the pipe by 90 degrees.
Conclusion
Connecting PPR pipe tees to pumps is a process that requires careful planning, the right components, and proper installation techniques. By following the steps outlined in this blog, you can ensure a reliable and efficient connection. As a PPR Pipe Tee supplier, I am committed to providing high - quality products and technical support to help you with your plumbing projects. If you are interested in purchasing PPR pipe tees or other PPR fittings, please feel free to contact us for more information and to discuss your specific requirements.
References
- Plumbing Handbook, various editions
- Manufacturer's manuals for PPR pipes, fittings, and pumps


